




Description
I'll be honest, I haven't always had the nicest relationship with my hair. My hair lost both its original soft texture and its natural shine as a result of heat style and my neglect of proper hair care. My discovery of a simple homemade DIY Hair Oil became my secret remedy which brought back peace and satisfaction to my daily routine. The product provides a gentle nourishment through its natural ingredients which I already trusted in. My hair felt smoother and looked more refreshed, which was a pleasant surprise for me. The small gesture made a huge impact on my hair care approach because it completely changed my perspective.
The blend I use combines jojoba oil and sweet almond oil as the base, with a few drops of lavender and rosemary essential oils. The combination achieves a complete sense of balance which works well for daily activities yet provides a sense of luxury that feels like personal care.
Now, using this DIY Hair Oil has become one of my favourite mindful rituals. Just a few drops before washing or after styling, and my hair feels nurtured again. Sometimes the most delightful secrets are the ones you create yourself, drop by drop.


Start by adding 2 tablespoons of jojoba oil and 1½ tablespoons of sweet almond oil into your dropper bottle. A small funnel really helps here to avoid spills. These two carrier oils create a balanced base that helps moisturise dry ends while keeping your hair light and smooth.
Next, fill the same bottle with five drops each of lavender and rosemary essential oils. You may mix these with other essential oils, such as peppermint or geranium, for a different scent. Geranium adds a floral balance, while peppermint gives a crisp, refreshing note. Just make sure any additional oils are also properly diluted in the carrier oil before applying.
Once all oils are added, secure the lid tightly and give the bottle a gentle shake to blend everything together.
Pour the final mixture into your dark glass dropper bottle using a small funnel. To keep the mixture fresh and shielded from the sun, carefully seal the lid. Any clean bottle will suffice if you don't have a dark glass bottle; it's even better if it's recycled. Before adding the mixture, just make sure the bottle is completely dry and cleaned inside to prevent moisture from degrading the mixture's quality.
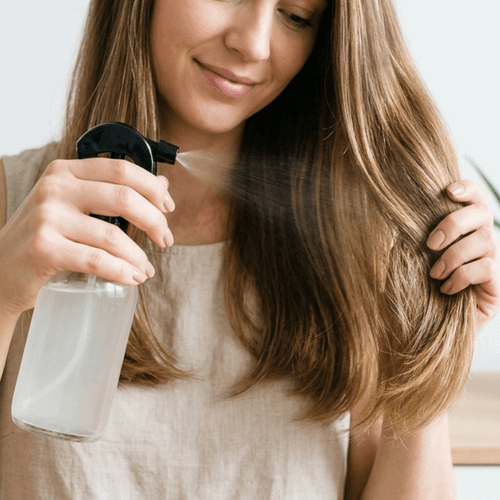
Start with dry hair and gently brush out any tangles before using your DIY Hair Oil. Fill your palm with a dropper's worth of oil, then work it through your hair's mid-lengths and ends. Covering your hair with a shower cap as the oil soaks in is an optional step that helps seal in moisture and keeps your clothes clean, but it can provide deeper nourishment. After about an hour of leaving it on, wash and condition normally. It will make your hair feel smoother, softer, and more renewed.
How to Customise It for Your Hair Type
One of the things I love most about this DIY Hair Oil is how easy it is to make it your own. Every head of hair has its quirks, mine tends to be dry at the ends and flat at the top. So learning to adjust the blend felt like discovering another little secret for keeping my hair balanced and happy. You can do the same with just a few tweaks.
Dry or Damaged Hair
If your hair feels rough or lifeless, try applying a few extra drops and letting the DIY Hair Oil sit for about an hour before washing. I do this once a week whenever my hair needs a little more care. If you want, you can leave it on overnight with a shower cap, overnight use is not recommended for everyone; monitor your hair and skin response. While overnight oiling can be beneficial for dry or damaged hair, it may not suit everyone. If your scalp feels oily, sensitive, or prone to breakouts, it’s best to keep it to a few hours instead.
Fine or Thin Hair
Less is more here. Use only a few drops and focus on the mid-lengths and ends so your hair doesn’t feel heavy. You can even mix a drop or two into your conditioner for a softer, lighter finish just enough to add shine without weighing things down.
Curly or Textured Hair
Curls often need extra moisture to look their best. I’ve seen how beautifully this oil works when massaged through damp hair after washing. It helps my curls feel softer and look more defined once dry.
Oily Hair
If your roots get greasy quickly, skip the scalp and apply just a touch of oil to the ends instead. Another option is to use it as a pre-wash treatment, massage it in about half an hour before shampooing. It’s a simple way to manage oily areas without making hair feel heavy or greasy.
Colour-Treated Hair
Jojoba and sweet almond oils are gentle and generally suitable for coloured hair. They add softness and a glossy finish. Just make sure your dye has fully set and always do a patch test before trying something new.
Safe Use and Warnings
When making and applying your DIY Hair Oil, it’s important to handle each ingredient with care. Proper use not only ensures safety but also helps you get the best results from your blend.
Sweet Almond Oil
Although gentle and nourishing, it’s always wise to do a quick patch test before using sweet almond oil, especially if you have nut allergies or sensitive skin. Apply a small amount to your inner arm and wait 24 hours. If no irritation appears, it’s safe to continue using.
Jojoba Oil
Well-tolerated by most skin types, but doing a patch test first helps ensure compatibility. Because it mimics the skin’s natural sebum, a little goes a long way, use sparingly to avoid greasiness.
It’s for external use only, so avoid contact with eyes. Keep it stored below 30°C. The oil may solidify in cooler temperatures, that’s perfectly normal. Just warm it slightly between your hands to liquefy again.
Lavender Essential Oil
Lavender essential oil is a beautiful multitasker, but it’s also highly concentrated. Always dilute it with a carrier oil (like almond or jojoba) before applying to your skin or scalp. Always perform a patch test before use.
Avoid contact with your eyes and sensitive areas. If you’re pregnant, breastfeeding, or have medical concerns, seek advice from a qualified professional before use. Store in a cool, dark place, tightly sealed to preserve its quality.
Rosemary Essential Oil
Has a refreshing aroma and is often used in hair care routines, but it must always be diluted properly before application. Mix just a few drops with your chosen carrier oil, and do a patch test to rule out irritation. Keep it away from eyes and mucous membranes. If you’re pregnant, breastfeeding, or prone to high blood pressure or epilepsy, speak with your healthcare provider before use.
As this oil is a Class 3 flammable liquid, store it safely in a cool, shaded area, away from heat sources and sunlight.
IMPORTANT SAFETY TIPS: Be sure to mark your homemade items well and keep them in closed containers out of the sun. Store all items away from kids and animals. Stop using the product right away if it comes into contact with your skin and your skin gets irritated.
DISCLAIMER: This information is intended for teaching purposes only and does not replace advice from a healthcare professional. This recipe is not meant to be used to treat conditions or be ingested. Be sure to test a small area of skin before using, and seek medical advice if you experience an allergic reaction or have health issues. Use these recipes at your own discretion.
First Published: 6 July 2026 | Last Updated: 18 September 2026
Additional Details
FAQ's
What are the benefits of using this DIY Hair Oil?
Should I apply hair oil to my scalp?
Does this homemade hair oil expire?
How often should I use this DIY Hair Oil?
Can hair oil help with split ends?
Should I apply hair oil on wet or dry hair?
Are there any oils I should avoid using on my hair?
Why does my hair fall out more when I oil it?
Can oiling your hair have any downsides?
- SKU:
- RCP-HOIL